Sharpen up and use your eyes
Kia ora tatou:
I promised a post on this subject and I shall deliver. I am not going into the ins and outs of doing this. There are plenty of links on the Net. Look here and here. I do want to talk about the whole issue however and offer some guidelines.
Digital cameras now offer us sharpness and microcontrast that we never had with film. And therein lies a trap. It is all too easy to overdo it. As I said in a previous post, it’s a bit like salt on your food. Enough improves the meal. Too much spoils it. The trick lies in understanding it so you can use it intelligently and with taste.
Sharpening doesn’t actually sharpen anything. It merely provides an illusion of sharpness. So let’s look at that.
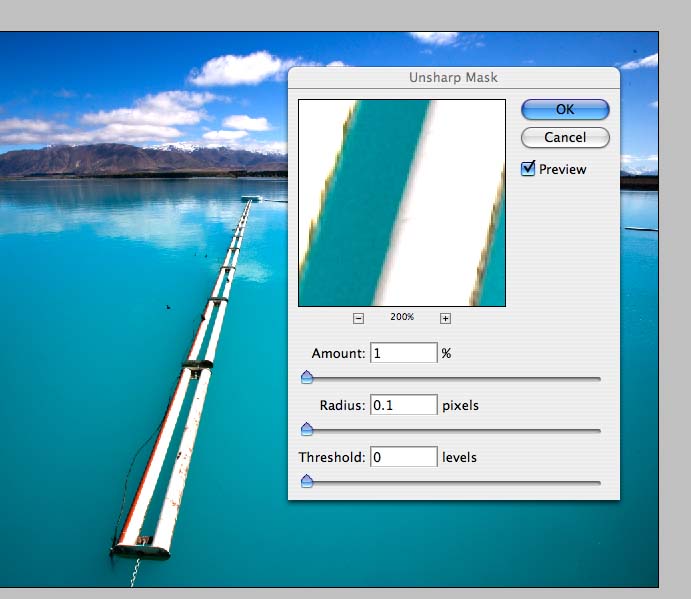
Open an image that is inherently contrasty, taken say on a bright day. Zoom it to 200-300%. Find a line where there is contrast and a big difference in pixel values. See the example at right.
Now open it in your image-editing programme. I will refer to Photoshop for (my) convenience. Select the unsharp mask filter and find the same point in your image. Make sure the amount, radius and threshold sliders are set to zero. Now push the amount slider to about 50.
Next, adjust the radius slider to the right and watch what happens. You will see that the dark values get darker and the light values lighter. The more you push it right, the further out this increase extends. The threshold is a bit like a governor on a car. It sets the point at which it kicks in.
This is what sharpness is; an increase in light pixels and a decrease in dark values along an edge, where the two meet. This is why your images appear much sharper in contrasty light; the edge contrast is much greater.
Sharpness does not just occur along obvious edges however. Textural detail is comprised of microfine edges. Photograph a seagull’s wing, or a section of tar seal, enlarge to 200% and watch what happens when you work the radius. Texture (read microcontrast) is increased.
The sharpening tools therefore have 2 functions:
- To increase edge contrast
- To increase microcontrast
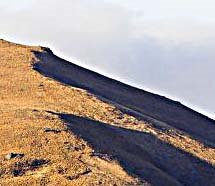
It is really easy to get intoxicated by this tool, and a real-vision check is in order. Look at a real edge and observe how sharp it really is. In bright light edge sharpness is quite defined. In dull light edges are much softer. Close objects are inherently sharper than objects in the distance. Over sharpening becomes really obvious when people attempt to sharpen that range of mountains 20 km away. The Hawkduns at sunset are not sharp. Only our brain tell us they are. Atmospheric haze and long-wavelength light prevent that.
Because we want to believe they are sharp, we go for the slider, and guess what happens?
Haloing, that ghastly ghost-edge effect that reminds me of watching I Love Lucy on an old B&W TV. See right.
When I see that, I know the photographer hasn’t thought it through.
And I better have a thing for salty food.
Ka kite ano.
posted by Tony Bridge @ 14:27
![]()
![]()


0 Comments:
Post a Comment
<< Home